Setting up your Email is easily done via the cPanel. You will need to know how many accounts you are allowed to setup. If you need more than is included in your plan contact your web hosting company to get more.
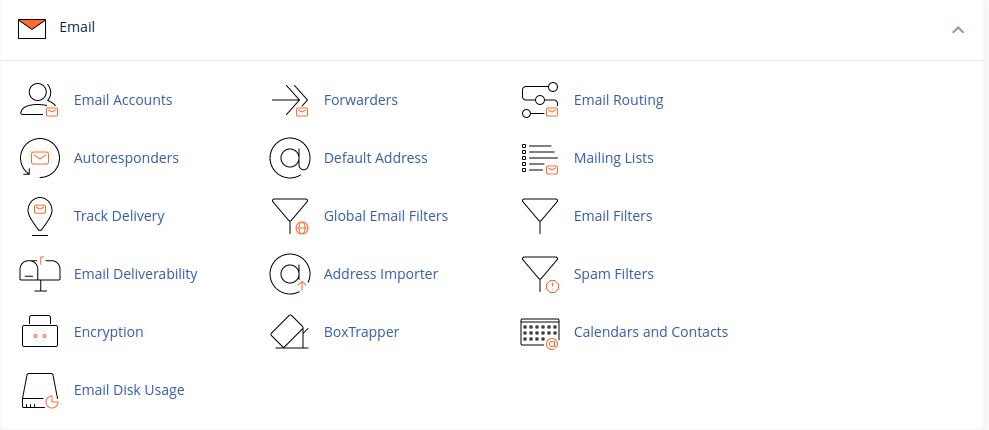
Step 1) Go to your cPanel and look for the section labeled Email and click on Email Accounts

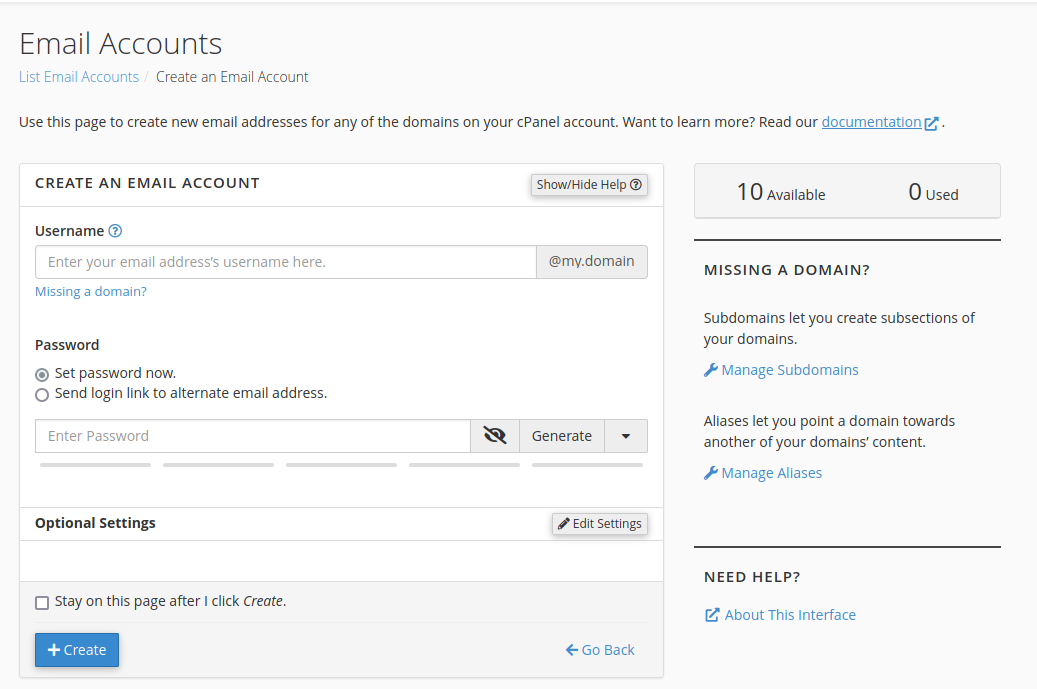
Step 2 ) Look at the image below. On the right, you will see that there are 10 Available and 0 created. Go ahead and click on create.

Step 3 )
On the image below, you can see a few options. The first one is user name. This is where you would add your name or something like info or sales. In the password section you have a few options. The easiest comes under set password now. Just enter a password, or click on Generate. See the eye ball icon with a line through it between the password box and and the word Generate? Clicking this will show your password. The third option is to click on the radio button labeled Send login link to alternative email address.

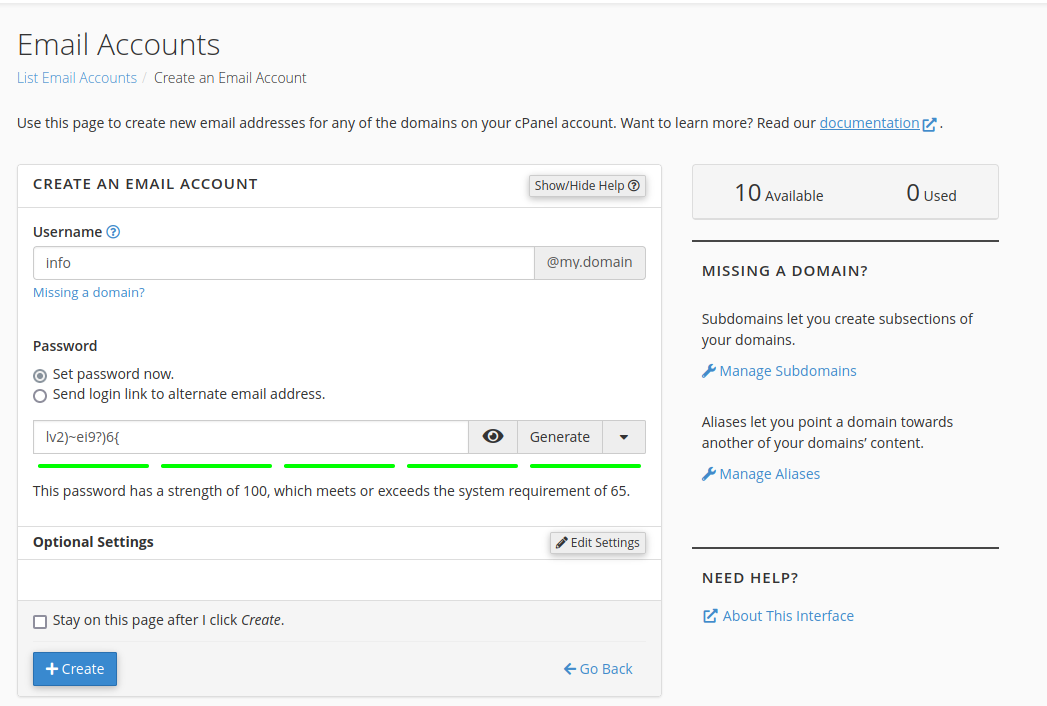
Step 4) Enter your user name and password. In the example below, I clicked on generate password. Keep the password in a safe place.

5) In the image below, you can see your new account. On the right you can see how many more accounts you can create, and how many you have created. Repeat the steps here until you have created all of the accounts you want. If you need more than your hosting company permits, feel free to contact them.
